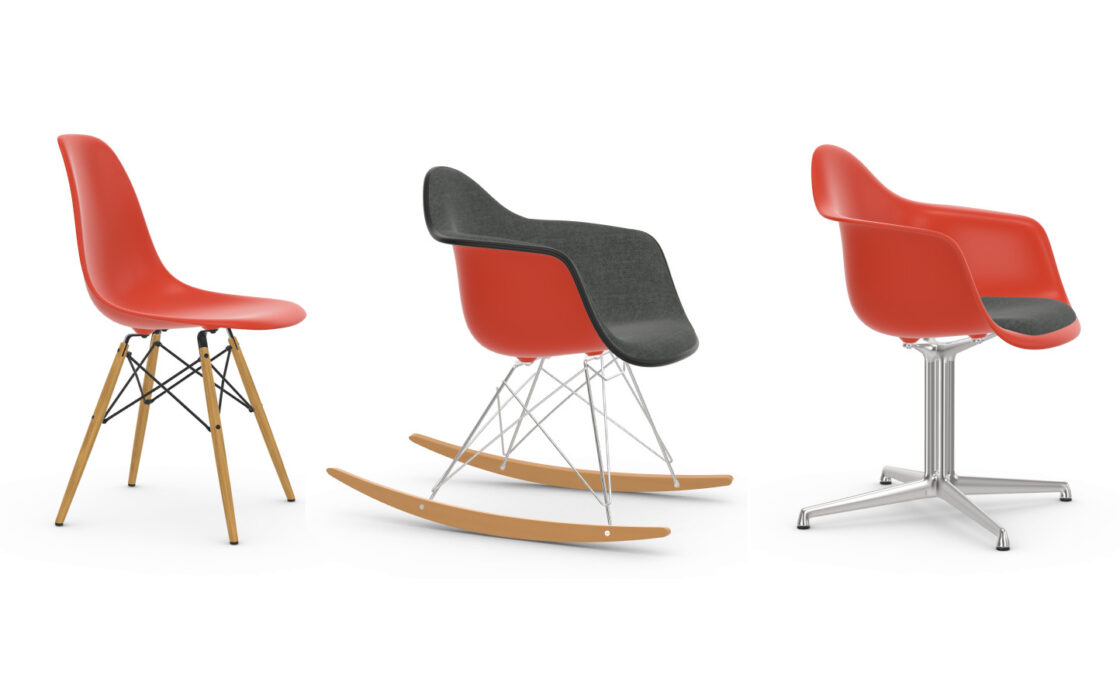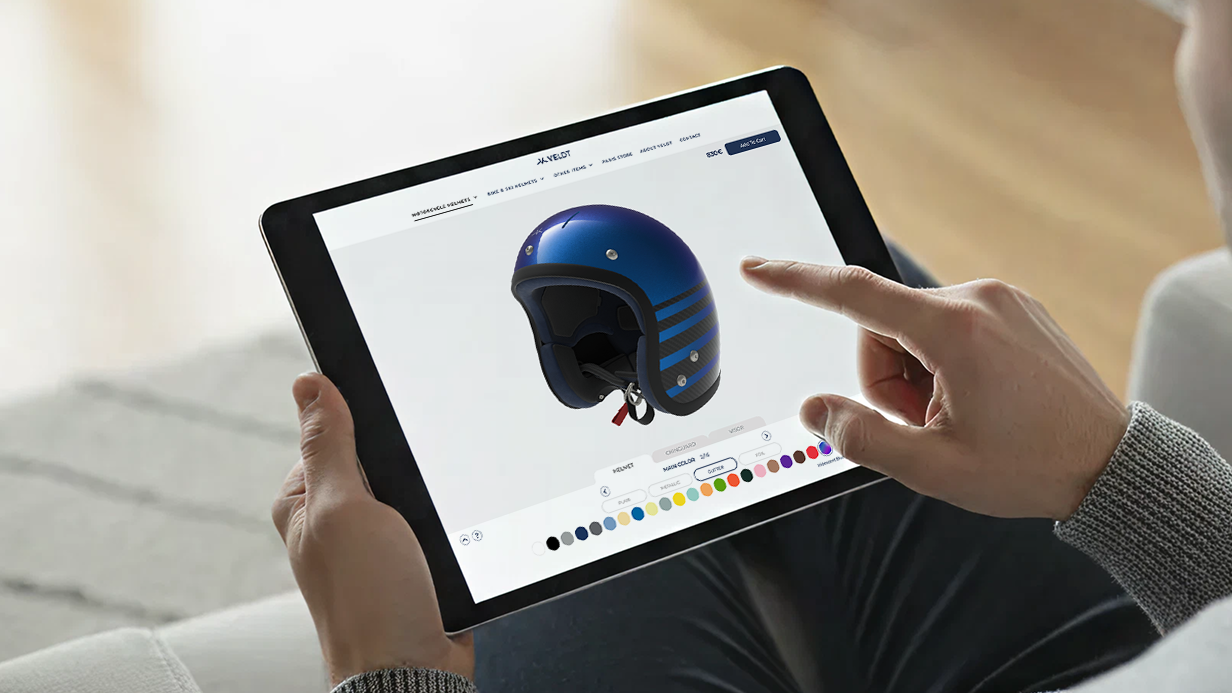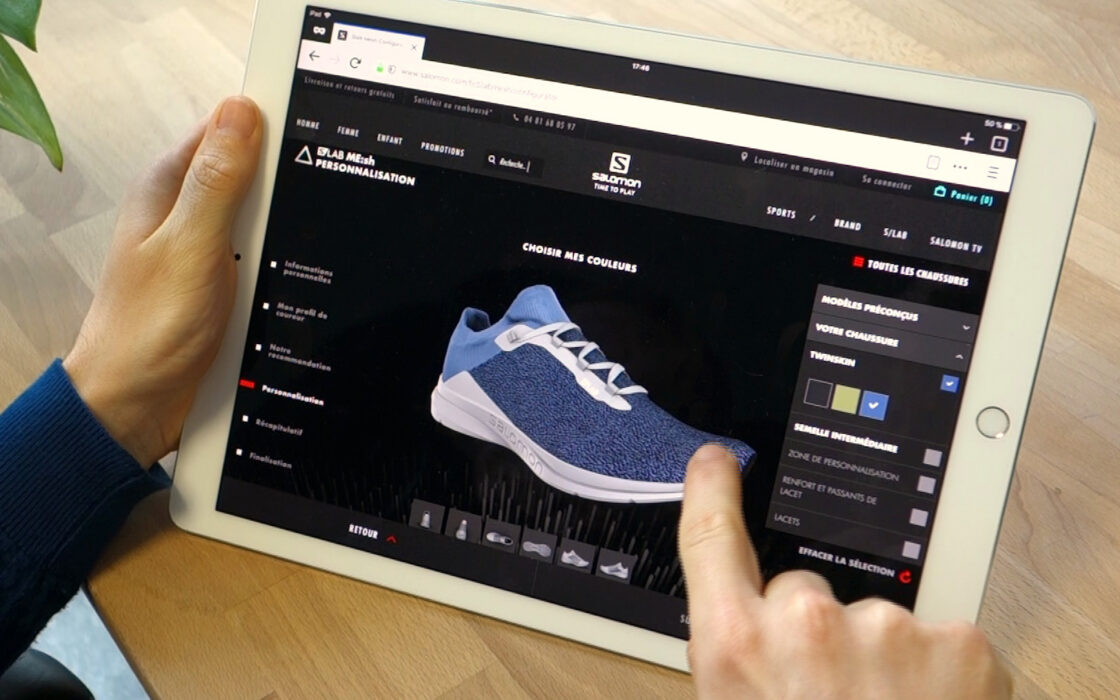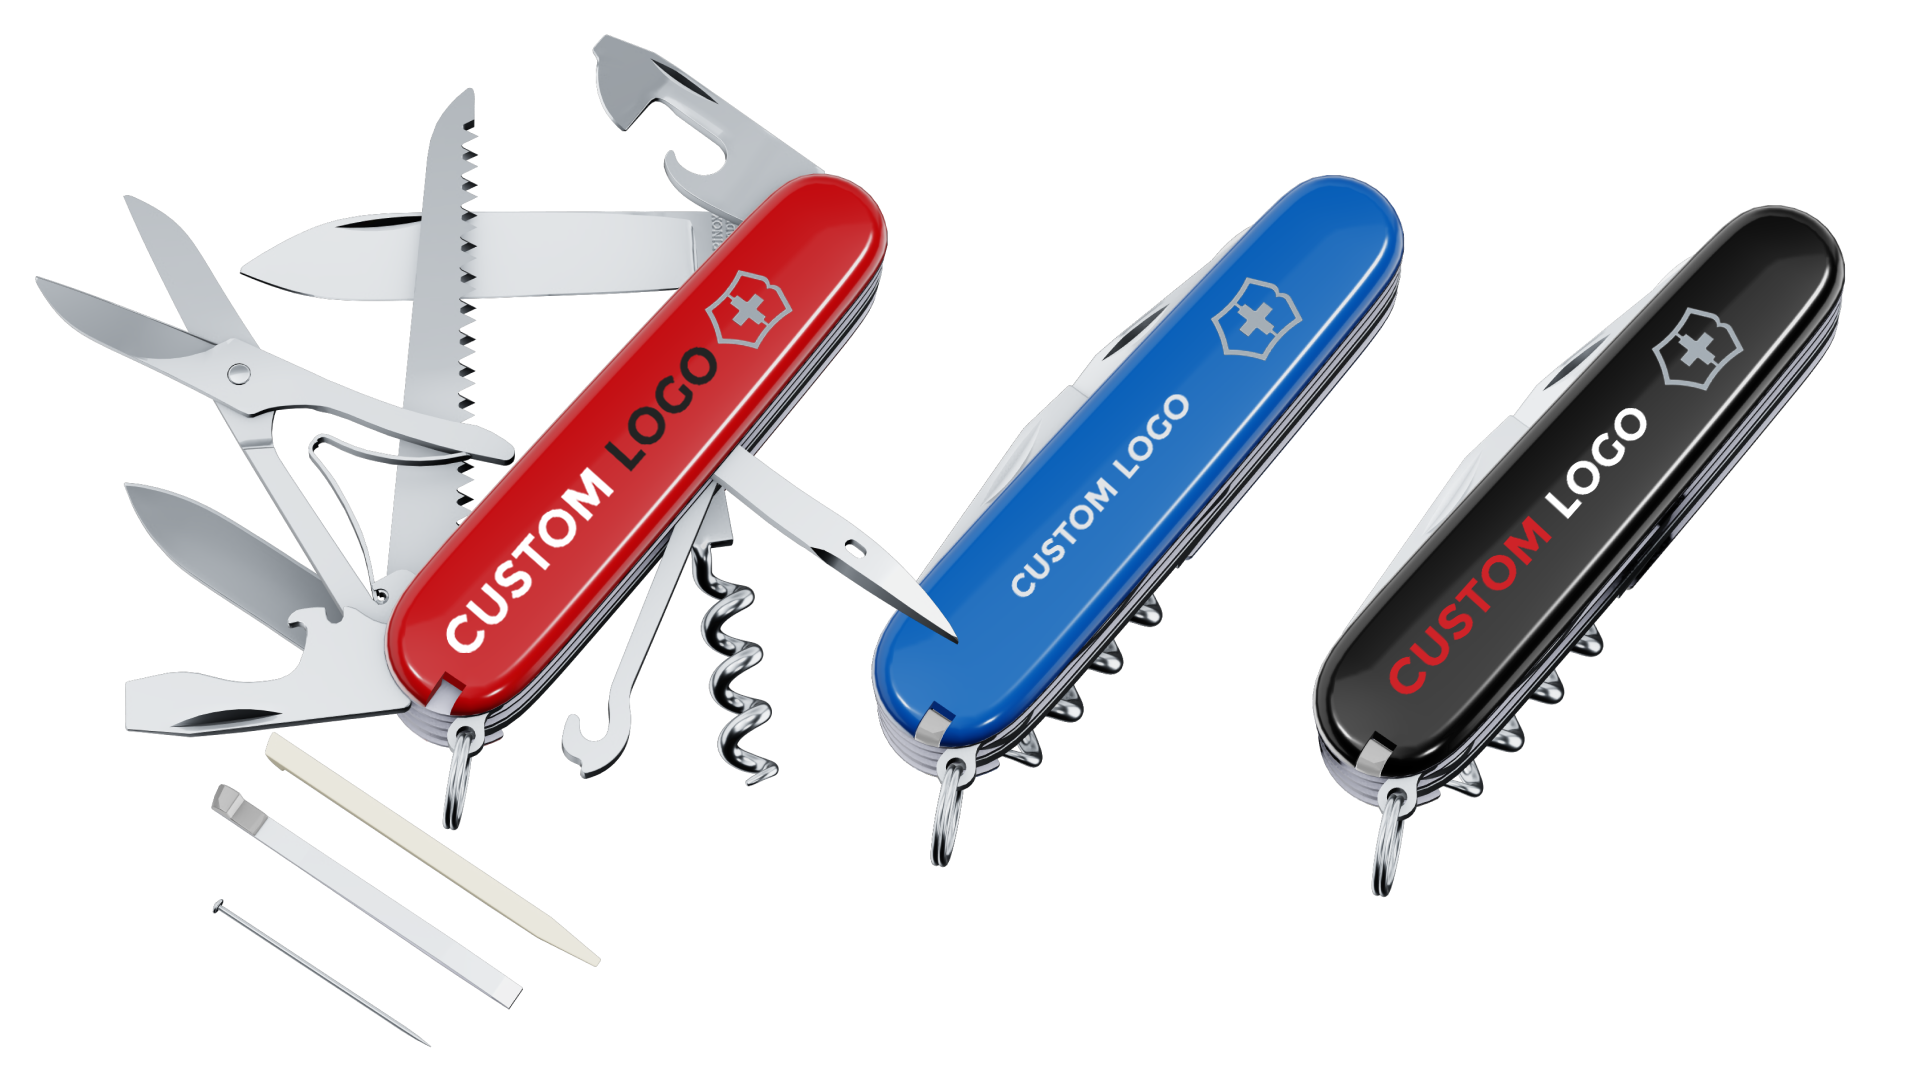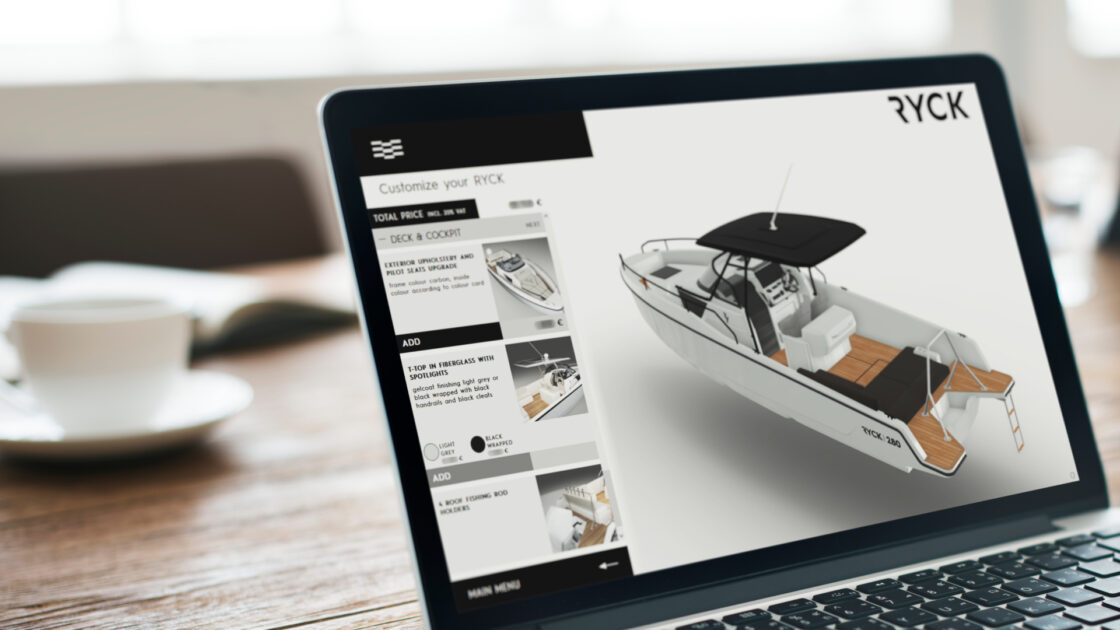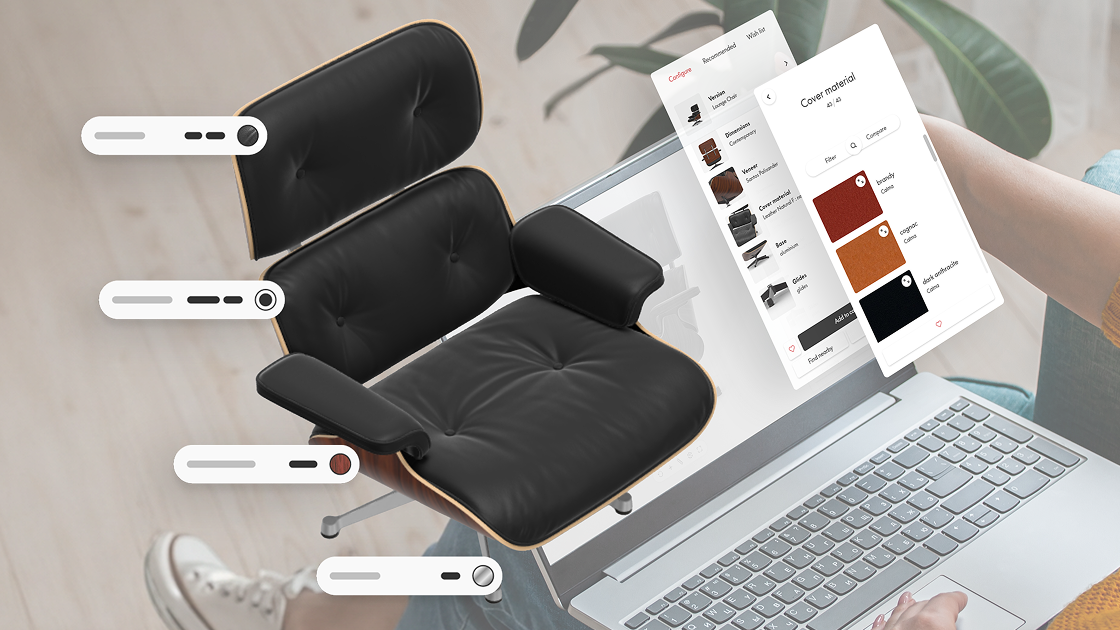

Your products come in countless combinations, but static images can only ever show a handful of them. A 3D product configurator lets customers build and explore their exact product in real time, yet the project itself raises tough questions about 3D models, tools, rules and integration. This step-by-step guide explains how to create a 3D product configurator, which approach fits your resources and which features turn configurations into sales.
Key take-aways:
- Definition: A 3D product configurator combines a real-time 3D viewer with a configuration interface, so every option a customer selects appears instantly on the product, from any angle.
- How customization works: Customers choose colors, materials, components or modules, or add their own text and images. Configuration rules make sure only valid combinations are offered.
- 3D models: Configurators need lightweight polygonal 3D models, such as glTF or GLB files, with a separate mesh for each configurable part. Existing CAD files make an excellent starting point.
- Build options: You can develop a configurator from scratch with a JavaScript 3D library, use a no-code platform or use a low-code platform. Platforms are faster to launch and easier to maintain, while custom builds offer total control at a higher cost of ownership.
- Key steps: Define your configuration scope, prepare your 3D assets, set up your options and rules, then generate or build your interface and embed it.
- Key features: The best 3D configurators include interactive product information, save and share, preset configurations, options summaries, AI-assisted personalization and AR.
- eCommerce integration: Configurators should embed into any eCommerce site. They should either pass selected options, prices and preview images to your cart, or generate quotes automatically.
- Choosing a platform: Look for no-code management, built-in asset optimization, enterprise security, easy maintenance and the flexibility to grow with your projects.
FREE RESOURCE
3D Configurator Project Planning Template
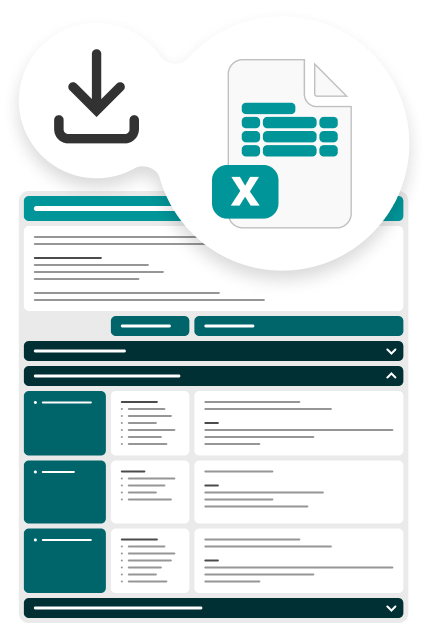
Use our ready-to-fill, 20-question template to map out your project in under an hour and build a budget-safe, fully aligned plan from day one!

What are 3D product configurators?
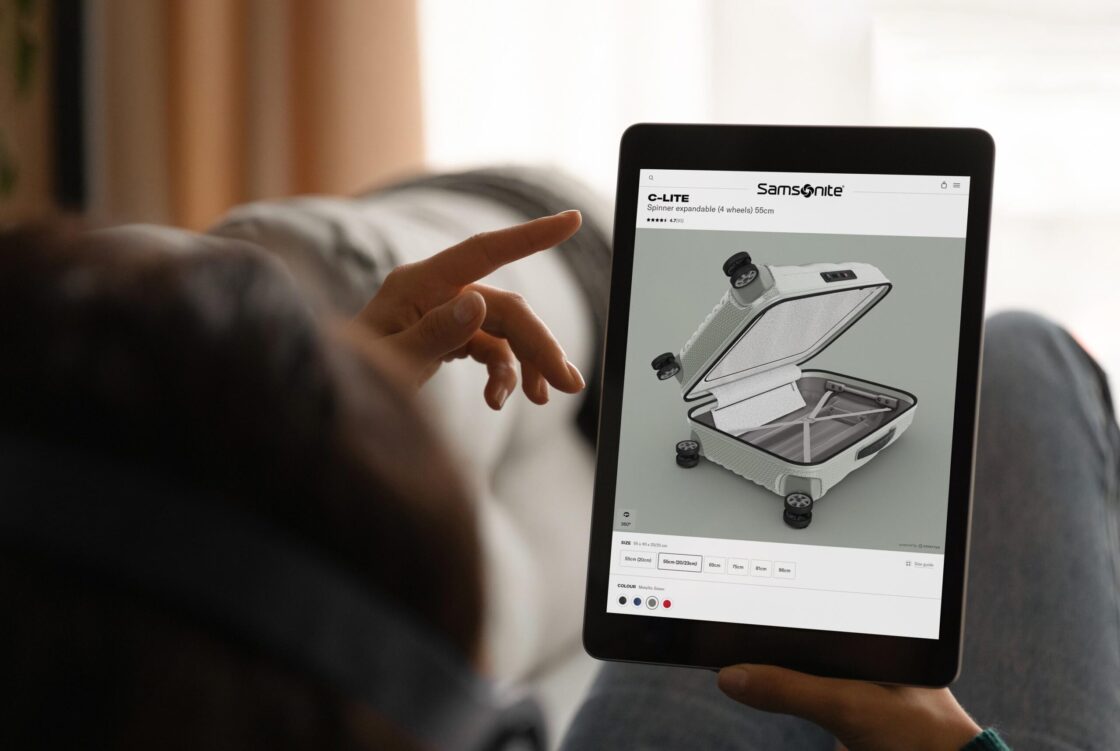
A product configurator is an interactive tool that lets customers build their own version of a product by choosing options such as colors, materials, components or dimensions, and seeing the result update instantly. A 3D product configurator renders every combination in real-time 3D, so customers can explore their creation from any angle before they buy.
If you’re new to the topic, our article What is a 3D product configurator? covers the definition, how it works, the benefits of a 3D configurator and real examples in detail. Here, we focus on what you need to know to actually build one.
What are the main types of product configurators?
The right configurator type depends on your type of product and the customization options you are offering. It also shapes the build itself, because each type places different demands on your 3D models, rules and interface.
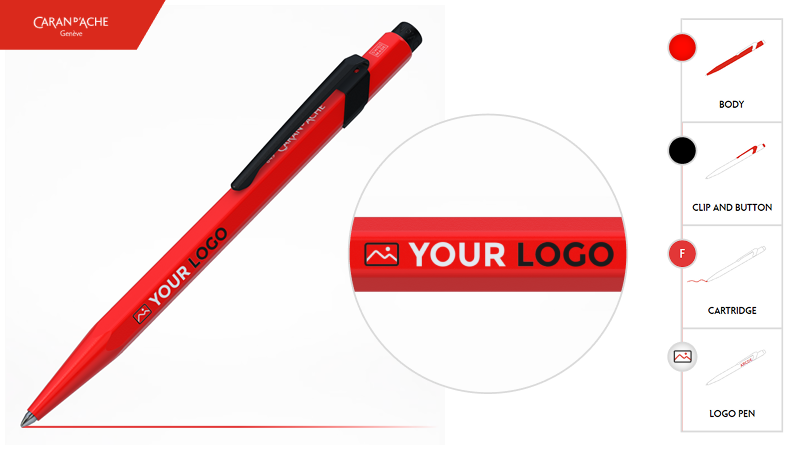
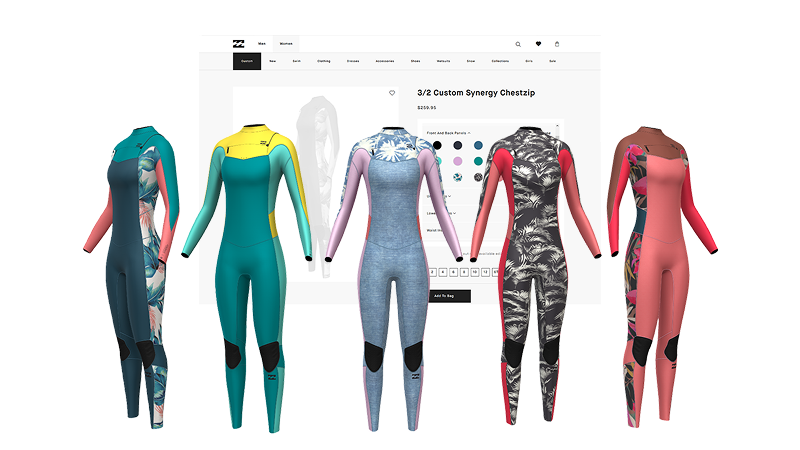
Personalized products
Customers add their own text, images or logos to a catalog product.
Made to order products
Customers choose components, options and finishes to configure the product to their exact needs and preferences.
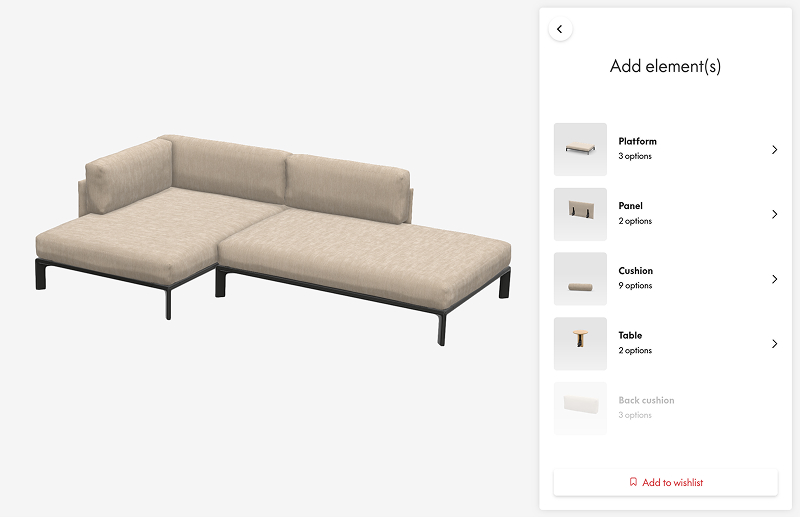
Modular or sectional products
Customers assemble interchangeable connected modules, such as sofa sections or storage units.
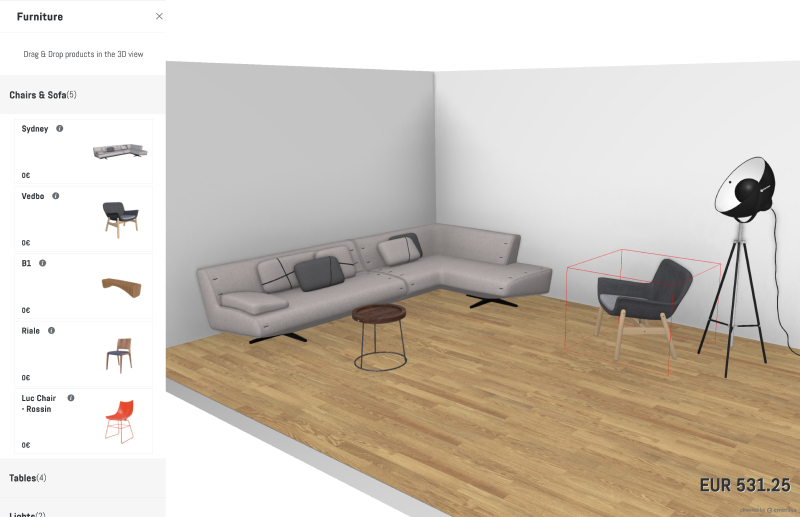
Rooms and spaces
Customers arrange several products in a virtual space.
A modular configurator, for example, needs a separate 3D model for each component. We’ll come back to this in the section on 3D models. The Emersya platform supports all four types, so you choose the right one for each of your product ranges, without changing technology.
What are the two building blocks of a 3D configurator?
Understanding 3D product configurators means understanding the two core components that work together.
The real-time 3D viewer
The 3D viewer is the visual half of the configurator. It displays the product with the customer’s current selections, rendered in real time as they rotate it, zoom in on details or switch options.
Its job is to show the final product exactly as it will look when it arrives, to provide online shoppers with confidence about what they are buying. This is why rendering quality and loading speed are such key features to compare when choosing a 3D viewer.
The configuration interface
The configuration interface (or UI) is where customers make their choices: the menu of options, swatches, buttons and steps that guide them through the configuration process.
A good interface intuitively guides shoppers through your product’s options and rules. It shows only compatible options and leads customers through each decision in a sensible order.
How do the viewer and the interface work together?
The two parts must be built to communicate seamlessly and in real-time. When a customer selects an option in the menu, the interface sends an instruction to the 3D viewer. The viewer applies the change straight away: a new color, a different component or an added module.
For the customer, this connection should be invisible. They click, the product changes. Any delay or mismatch between what they select and what they see quickly erodes their confidence in the shopping experience.
This is why your 3D models, configuration options and interface need to be prepared together, rather than as separate projects. Each option in the menu has to match a specific part, material or component in the 3D model, so the whole thing works as a single, seamless experience.
On the Emersya platform, this connection is built in. Once you’ve set up your options, the platform generates an interface that’s already linked to the 3D viewer. If you’d rather design your own interface, Emersya’s API lets your developers connect it to the viewer and control every interaction in real-time.
How to use 3D models in configurators?
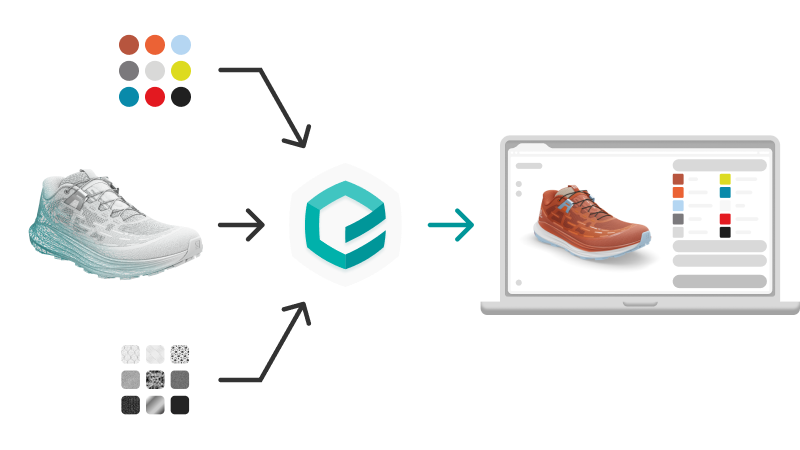
3D models are the foundation of any 3D configurator. They define the shape of your product and every part customers can change, while digital materials define how each color, material and finish looks. How they are prepared has a direct impact on how realistic your configurator feels, how quickly it loads and which options you can offer.
How to prepare 3D models for a configurator?
Which 3D file formats work for online configurators?
Online configurators use polygonal 3D models. A polygonal model describes the surface of a product as a mesh: a network of small flat shapes (polygons) joined together, like a digital wireframe covered with a skin. This is the type of model a web browser can display and enable a customer to interact with in real time.
The most common formats are glTF and its single-file version GLB, as well as DAE, FBX and OBJ. Most 3D design software can export to at least one of these. The Emersya platform supports more than 20 3D file formats on upload, so in most cases you can work with the files your team or agency already produces. You’ll find the full list in our supported formats and asset guidelines.
Can you use CAD files for a 3D configurator?
Many manufacturers already have CAD files (computer-aided design models) created for engineering and production. These are built for manufacturing precision rather than display. They describe exact mathematical surfaces and often include internal parts, screws and details customers will never see.
Using CAD files in a product configurator rarely works well as they are too detailed and not built for showing the look and feel of a product’s materials and finishes. However, they make an excellent starting point. To prepare CAD files for a configurator, they should first be converted into polygonal models, then made lighter by removing any internal parts and simplifying the surface layer geometry. The main advantage of this workflow is that your configurator stays true to the real product’s proportions and details but optimized for loading and interacting with online.
Who should prepare your 3D models?
You have three main options: an in-house 3D designer, an external 3D or creative agency, or your configurator provider.
An in-house designer knows your products best and can keep models up to date as your collections evolve. They may have less experience for real-time web display, though. An agency brings that specialist skill, but you’ll need to brief it carefully on configurator requirements.
Emersya’s in-house team can create 3D models from scratch using your product images, CAD files, material swatches or physical samples. They can also optimize the models you already have. Every project is handled internally under strict confidentiality agreements and nothing is outsourced.
3D MODELING
Need help preparing your 3D models?
Our in-house team can create 3D models from scratch or optimize the ones you already have. Contact our team to discuss your project.


What makes a 3D model configurator-ready?
A model that looks perfect in design software or a pre-rendered image isn’t automatically suited to a configurator. Three requirements make the difference.
Is the model optimized for the web?
A configurator downloads your 3D model into the customer’s browser, often on a phone with a mobile connection. A heavy model with millions of polygons or very high-resolution textures (the image files that give surfaces their color and detail) loads slowly and responds less smoothly.
Optimization means reducing that weight while keeping everything customers can actually see. In practice, it involves reducing the number of polygons where the detail isn’t visible, a process known as decimation. It also involves resizing textures to the resolution a screen genuinely needs.
The Emersya platform includes an optimization feature that reduces the weight of 3D models and digital materials without losing the precision of their shape or the realism of their rendering.

Are the meshes separated for each configurable part?
Every configurable or customizable part of your product will need its own separate mesh in the model. If the seat, frame and legs of a chair are merged into a single mesh, the configurator can’t apply a different material to each one or swap one component on its own.
This is a frequent stumbling block for first-time configurator projects. It also explains why 3D scanning isn’t always the shortcut it seems. A scan captures the product as one continuous surface, with its colors fixed into it. Turning that scan into a configurable model requires a significant amount of manual work: splitting the mesh into parts and replacing the scanned surfaces with separate digital materials.
Do modular products need a model for each component?
Yes! In a modular configurator, customers add, remove and rearrange components such as sofa sections, shelving units or storage modules. Each component needs its own 3D model so the configurator can load it on demand, without reloading the entire product every time a customer adds a piece.
This keeps the experience fluid as configurations grow larger. It also means you can add new modules to your range without rebuilding the existing ones.
How do digital materials bring each option to life?
While 3D models define your product’s shape, digital materials define how it looks: the grain of a wood, the weave of a fabric or the reflection of a shiny metal. For customers choosing between finishes, the material or finish is often the deciding factor, so they have to be true-to-life.
Modern digital materials store more than a color. They describe how a surface reacts to light: matte or glossy, rough or smooth, transparent or metallic. This is what gives a grainy leather a rough and bumpy feel in real-time 3D rather than looking like a flat image stretched over a shape.

Materials can come from several sources: photos or scans of physical samples, existing material libraries or industry formats such as U3M, AxF and Substance (all supported by the Emersya platform).
The most efficient approach is to build reusable material libraries. On the Emersya platform, a material imported or created once can be applied to every product and configurator that uses it. Update it in the library and the change is deployed to all synchronized configurators at once.
This is how customers like Vitra, who offer thousands of fabric options, can easily manage and update their configurator options across their entire product range.
What are the tools to build a 3D product configurator?
Every 3D configurator needs three things: a real-time 3D viewer, a system for managing options and rules and an interface for customers. You can bring these together in three main ways: develop everything from scratch, use a no-code platform or use a low-code platform. Each process of creating a 3D configurator offers a different balance of cost, speed and control.
Your choice should be based on your available resources (mainly internal teams and budget), your project timeline and who will be responsible for managing the configurator day to day.
What does a fully custom build involve?
A fully custom build means your developers, or a specialized agency, create the entire configurator in code. This typically involves three layers:
- A JavaScript 3D library such as Three.js, Babylon.js or PlayCanvas to display the product in the browser.
- Rendering work on top of that library, covering lighting, materials and performance tuning, so the product looks realistic and runs smoothly.
- A custom web application that handles the options, rules, pricing and interface.
The main advantage is control. You can build any experience you can imagine, limited only by your time and budget.
The trade-off is everything that comes with owning the code. You’ll need to host it, secure it, keep it compatible with new browsers and devices and build admin tools so your team can update products. Any new product or major change to the options or pricing structure means a new project for your developers. These costs continue long after launch, so a custom build is best judged on its total cost of ownership rather than its initial quote.
What can a no-code platform do?
A no-code platform comes with a rendering engine and a visual setup interface already built in. You upload your 3D models and materials and define your configuration options through menus rather than code. The platform then generates a ready-to-use interface you can adapt to your brand.
This is the fastest and most affordable route. Product and marketing teams can manage the configurator themselves, without waiting on developers.
The limit is flexibility. You work within the features and interface the platform provides, meaning you must plan for both current and future features when evaluating providers. Products with complex logic or brands with specific experience requirements may find the generic interface too restrictive.
What does a low-code platform add?
A low-code platform combines the same built-in rendering engine and no-code setup with the freedom to build your own interface (or have one built for you). Your team defines options and configuration rules on the platform, then a developer creates a bespoke interface connected to the 3D viewer through an API (the programming connection that lets two systems talk to each other).
You get a configurator designed around your brand and your product logic, without having to build or maintain the 3D technology or admin platform underneath. It’s also easier to iterate: you can launch a first version quickly, learn from real customer behavior, then make subsequent updates to the interface.
How do the three options compare?
| Decision criteria | Full custom | No-code | Low-code |
|---|---|---|---|
| Setup time | Several months | 1 day to a few weeks | 1 week to a few months |
| Cost | Highest | Lowest | Moderate |
| Resources needed | Developers and 3D artists | 3D models, platform license | 3D models, platform license, a developer |
| Control over rules and interface | Unlimited (limited only by time and resources) | Lower (limited by the platform’s features) | High, with easy iterations from first version to final release |
| Infrastructure | Built, hosted and secured by you | Hosted and maintained by the platform | Hosted by the platform; your developer maintains the custom interface |
| Content updates | Slow and costly, handled by developers | Quick and easy, within the platform’s limits | Quick and easy |
| Managed by | Technical teams | Product and marketing teams | Product and marketing teams with a developer |
Which option is right for your project?
There’s no universally right answer, but a few questions will quickly point you in the right direction:
- How complex is your product? Simple color and material choices suit a no-code setup. Multi-level rules and dependencies between options call for more control.
- How important is a bespoke brand experience? Premium brands often want an interface that feels fully their own, which favors low-code or custom.
- What resources do you have? Without in-house developers, no-code keeps you autonomous. With a front-end developer, low-code opens up much more.
- How fast do you need to launch? A tight deadline, such as a product launch or trade show, rules out most fully custom builds.
- How often will your products change? Frequent updates to options, materials or prices favor a platform your business teams can manage directly.
For most eCommerce brands selling configurable products, a platform-based approach covers their needs at a fraction of the time and cost of a custom build. Custom development makes sense when the configurator itself is a core product, or when no platform can support the experience you need.
What are the steps to create a 3D product configurator with the Emersya platform?
The Emersya platform offers two workflows for building a 3D product configurator. In the no-code workflow, your product or marketing team sets everything up on the platform and the interface is generated automatically. In the custom workflow, developers (yours, your agency’s or Emersya’s in-house team) build a bespoke interface connected to Emersya’s 3D viewer. Either way, the platform handles the 3D technology, hosting and asset management for you.
So, regardless of your internal resources and whether your custom product is simple or highly complex, there’s a route that works for you. Both start the same way: with a clear scope.
What should you define before you start?
Before you upload a single model, take the time to define your configuration scope. A clear scope keeps your internal teams aligned, speeds up discussions with providers and avoids costly rework later in the configuration process.
At a minimum, define and approve internally:
- Your goals: what the configurator should achieve, such as more conversions, fewer returns or faster quotes.
- Your product options: which parts can be configured and with which colors, materials or components.
- Your configuration rules: which options can be combined, which are mandatory and whether some customer choices should change the options available next.
- Your expectations for the user experience and interface: how bespoke the design should be and which specific features customers will need.
- Your pricing: whether customers should see a price and how it’s calculated.
- Your assets: which 3D models, CAD files and material samples you already have.
- Your channels: where the configurator will be used, from your website to retailers, stores and sales reps.
Your configuration rules and expectations of the UX and UI deserve particular attention at this stage, because they largely determine which of the two workflows you’ll need.
FREE RESOURCE
3D Configurator Project Planning Template
Use our ready-to-fill, 20-question template to map out your project in under an hour and build a budget-safe, fully aligned plan from day one!

How to build a configurator with the no-code workflow?
What are the steps?
- Upload your 3D model.
- Set up configuration options by assigning the available colors and materials to each configurable part of the model.
- Define all your product options, prices and configuration rules through the platform’s no-code interface.
- Let the platform generate your interface. Emersya automatically creates a standardized user interface that lets customers intuitively browse and choose from all your options, seeing each choice in real-time 3D as they go.
- Personalize the interface and 3D viewer with your branding, fonts, colors and icon style.
- (Optional) Activate augmented reality so customers can view any configuration in their own space on their mobile devices.
- Embed and share. The platform generates a unique configurator link you can embed in any website or eCommerce platform, or share with sales teams, retailers and stores.
In this workflow, you define every option that can be combined. Incompatible combinations are never offered and mandatory options are always included. What the no-code workflow doesn’t support is conditional logic, where the options available change depending on earlier choices, such as offering certain armrests only with a specific sofa width.
Who is this workflow best for?
This is a true no-code workflow. Product and marketing teams set up and update options, rules and pricing themselves, while the platform generates and maintains the interface they personalize.
It’s best suited to:
- Teams that want to build and manage a 3D configurator without a developer.
- Products that don’t need advanced configuration rules.
- Brands that don’t need a fully bespoke user experience and interface.
Timing depends on how many options you offer, but a configurator using the generic interface can typically be prepared in a couple of days once your 3D assets are set up on the platform.
How to build a configurator with a custom interface?
What are the steps?
- Upload your 3D model and digital materials.
- Assign the available colors and materials to each configurable part of the model.
- Define which options can be selected together through the no-code interface.
- Design a bespoke interface for your user experience, including any special features and the path that guides customers through the options and rules.
- Develop the interface. Your developers, your web agency or Emersya’s in-house team build it, coding the product options, configuration rules and their pricing.
- Connect the interface to the 3D viewer. Using Emersya’s JavaScript API, each option in the interface is linked to the viewer so the correct version of the product appears instantly in real-time 3D.
- Add advanced features through the API, such as saving and reloading configurations, generating preview images, displaying product dimensions, applying custom text or images or generating PDF summaries and quotes.
- (Optional) Activate augmented reality so customers can view any configuration in their own space on a smartphone or tablet.
- Embed and share. The platform generates a unique configurator link you can embed in any website or eCommerce platform, or share with sales teams, retailers and stores.
- Integrate with your tech stack, using the API to connect the configurator to your eCommerce platform, ERP, PIM/PLM or order management system.
In this workflow, pricing and business logic are coded into the custom interface. When Emersya’s team builds your interface, we also provide a no-code administration system tailored to your configurator. Your team can then update product options and prices or add new languages and currencies independently once the project is live.
Who is this workflow best for?
This is a low-code workflow. Your teams manage all visual product options on the platform without code, while developers code the configuration logic, build the bespoke interface and connect it to the 3D viewer.
It’s best suited to:
- Brands that want a fully bespoke user experience and interface.
- Complex products that need advanced configuration logic, where the available options change depending on earlier choices.
- Modular products, such as modular sofas or shelving units.
- Room planners, enabling customers to configure a virtual space, drag & drop products into it from a catalog, then position and configure them in context.
Requirements:
This workflow requires a developer experienced in building JavaScript web applications, either from your own team, a web agency or Emersya’s in-house team. A custom configurator typically takes a few weeks to prepare, depending on the number of options, the complexity of the rules and your UX requirements.
DEMO
See which workflow is right for your project
Book a demo and our team will show you how the no-code and custom workflows work on the Emersya platform.

How to integrate a 3D configurator into eCommerce?
Integrating a 3D configurator into eCommerce involves two steps: embedding the configurator on your product pages, then passing each customer’s product configuration to your cart, quoting or order systems. With Emersya, the configurator embeds on any site via an iframe, while the API connects configuration data to your existing sales process.
How do you add a 3D configurator to your eCommerce site?
Emersya configurators embed into any website or eCommerce platform via an iframe, the same way you’d embed a video. There’s no plugin to install and no need to rebuild your site, so your existing product pages and checkout stay intact. Our how to embed guide walks you through the process.
This means you can deploy a 3D configurator for eCommerce sites of any kind, from leading platforms to custom-built stores. Emersya configurators integrate with a wide range of eCommerce and enterprise platforms (including Shopify, Salesforce Commerce Cloud, SAP, Adobe Commerce, WooCommerce, PrestaShop and Solusquare).
How does the configuration reach your cart or sales team?
Embedding is only the first step. As customers configure, your site can listen to events in the configurator and retrieve the full product data: selected options, total price, preview images and a link to replay the configuration in 3D.
If you sell directly online, your platform uses this data to fill the cart and order summary. The configured product then flows straight into your normal checkout.
If your sales process relies on quotes, the same data powers automatic quote generation. The configurator becomes a visual CPQ (configure price quote) tool, producing a professional PDF summary or quote with the selected options, preview images and the 3D replay link. You can offer to send it to customers in exchange for their email address, turning each completed configuration into a qualified lead for your sales team.
Either way, pricing and quoting no longer depend on manual calculations. Customers get an accurate answer the moment they finish configuring.
How can you automate orders and production?
For deeper integration, Emersya’s API connects the configurator to the rest of your tech stack, including your ERP, PIM/PLM or order management system. Configuration data, orders and manufacturing outputs then move between systems automatically, without manual re-entry or the errors that come with it.
Two further features help close the loop:
- Centralized order management: Emersya’s optional Order Management solution collects orders from all your configurators in one place, where your team can filter, search and track each order’s status.
- Production files: for product customization with custom text or images, Emersya can generate production-ready files, ready to print, engrave or send to manufacturing.
Automating these steps removes the manual work that slows down custom orders. Your team spends less time preparing quotes and production files. They can focus on the customers who are ready to buy.
How do the best 3D configurators improve the customer experience?
The essential features of a 3D configurator are allowing customers to visualize every option and combination from any angle, in true-to-life real-time 3D, as they make their choices. Choosing becomes easier and more enjoyable. Customers feel confident about what they’re buying, so they’re more likely to convert once they find the configuration that’s right for them.
Beyond that core experience, specific features of a 3D product configurator can enhance the user experience at each stage of the decision. Here are the ones that make the biggest difference.

with interactive annotations & animations
How can customers explore product features for themselves?
Interactive product information such as dynamic annotations and triggered animations lets customers explore the parts that interest them most. They open a compartment, try out a feature or reveal internal components through an exploded view. Each interaction provides them with more information without having to scroll through the product page, ask a sales rep, or search another site.
This enhanced “try before you buy” experience builds consumer excitement as well as confidence.
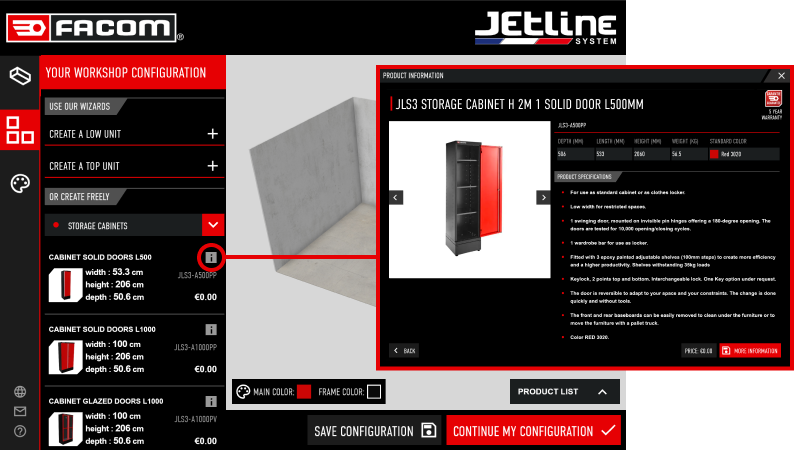
with info buttons
What makes a configurator interface intuitive?
The best configurator interfaces guide customers through the configuration process without them noticing. The more complex the product and its options, the more guidance customers need to make their choices.
The challenge is providing that guidance without overloading the menu. Info buttons are a simple solution: they open detailed product information in a separate panel, giving customers easy access to what they need while keeping the configurator menu clean and focused.
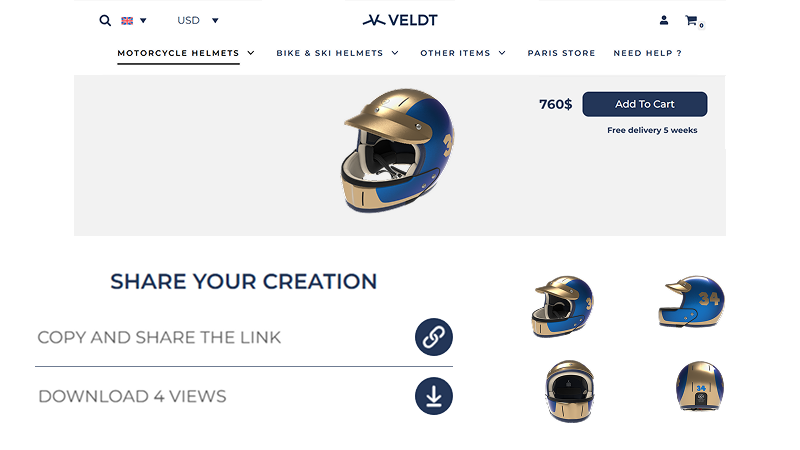
Why let customers save and share their configuration?
Customers aren’t always ready to decide straight away. For considered purchases, they often want a second opinion from a partner, a colleague or a friend. A save and share feature lets them save their configuration and share a link to it, then reload it into the configurator later to make final adjustments before ordering. The decision process doesn’t have to end when they close the tab.
Sharing also works in the brand’s favor. Every configuration shared on social media or in a group chat puts your product in front of new potential customers, creating organic product marketing.
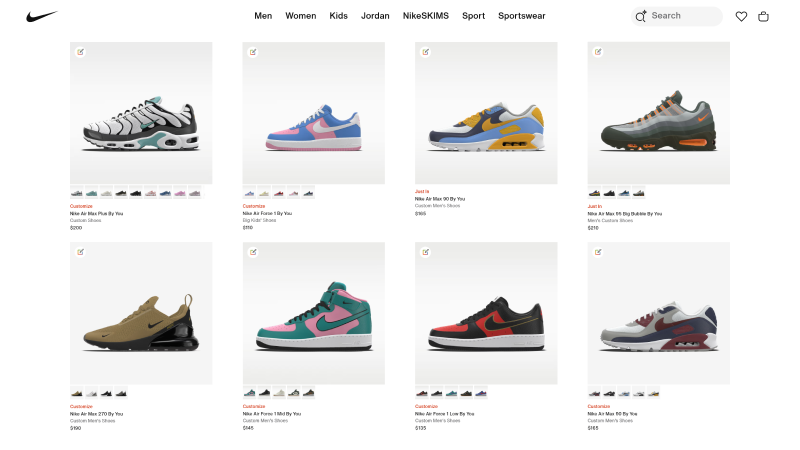
How do preset configurations reduce decision fatigue?
Starting from a blank canvas can be intimidating, especially when a product offers hundreds or thousands of possible combinations.
Preset configurations give customers a starting point. They can browse images of popular or curated configurations, load one into the configurator, then adjust it to their taste. This reduces the sense of overwhelm and helps customers make progress faster.
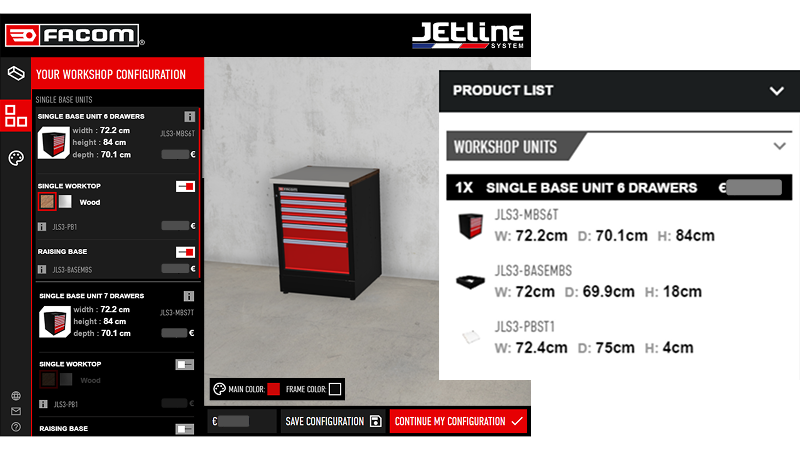
with options summary
How does an options summary help customers decide?
On complex products with several levels of options, it’s easy for customers to lose track of what they’ve selected. Add dynamic pricing to the mix and customers on a budget also want to see which choices have the biggest impact on the price.
An options summary button solves both problems. Separate from the main configurator menu, it lists every selected option with its price, so customers can check their choices at a glance. They can quickly decide what to keep and what to replace with a more affordable alternative.

with image library
How can AI enhance the customization experience?
Letting customers apply their own image to a product makes it truly theirs, which drives desire and engagement. The problem is that customers may not have a suitable image to hand, or the design skills and software to create the image they have in mind.
AI can remove this friction in two ways. It can help you prepare a library of ready-to-use images customers can choose from. Or, it can even let customers generate or edit their own images from a simple text prompt, directly in the configurator.
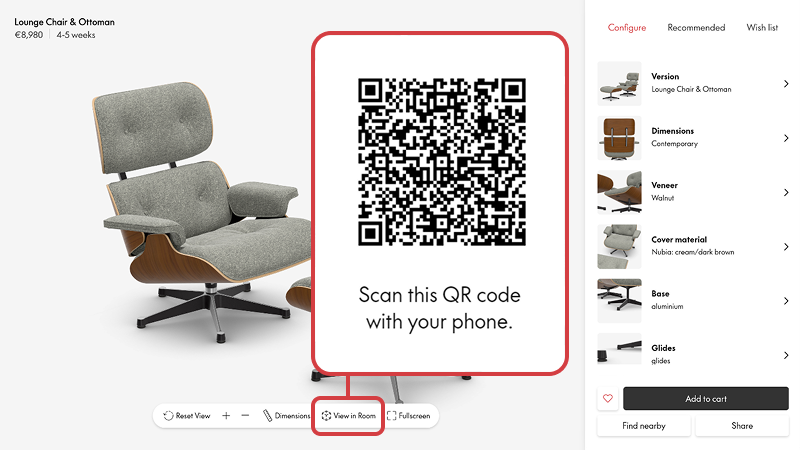
How can customers see their configuration in their own space?
For many products, the final question customers ask themselves isn’t about a color or a finish. It’s about how the product will look in their home, their office or on them.
With augmented reality, customers can switch from the 3D configurator to an AR view and place their configured product at real scale in their own space, using their smartphone or tablet. No app download is needed. It’s one of the most effective ways to close the gap between what customers imagine and what they receive.
What to look for in a 3D configurator platform?
When evaluating the best tools for creating 3D configurators, look beyond the first launch. The right platform lets your own teams manage it, optimizes your assets for performance, stays stable and secure as you scale, is easy to maintain and can grow with your projects. These five criteria decide whether your configurator stays an asset or becomes a burden.
For a complete evaluation checklist, see our guide on how to choose the right product configurator software
1. Can your team manage it without developers?
A configurator is never finished. New products, materials, options and prices arrive every season. If every update needs a developer, your configurator quickly falls behind your catalog.
Look for a platform with a no-code interface your product and marketing teams can use directly. The Emersya platform lets your teams update all options, configuration rules and pricing independently, without needing a developer or 3D expert.
Centralized asset libraries make the difference at scale. You create multiple configurators from the same models and materials, then deploy updates across all synchronized projects in one click.
2. Does the platform optimize your assets for you?
As we saw earlier, a configurator is only as fast as the 3D models and materials behind it. Optimizing every asset by hand takes time and specialist skills your team may not have.
The Emersya platform includes built-in optimization features. The 3D model optimizer reduces the number of polygons through decimation with built-in controls to avoid losing the precision of the product’s shape. Automated material optimization is also available to adjust the resolution of all textures to the best balance between true-to-life rendering and loading time.
3. Is the platform stable, secure and scalable?
A configurator that slows down during a traffic peak or goes offline means lost sales. One that exposes your 3D models puts your intellectual property at risk.
Emersya’s platform and 3D viewers are hosted on AWS infrastructure, with servers replicated around the world. This keeps loading times short and service reliable, even for a global company with very large customer bases. Scaling is built in too. You can duplicate configurator projects and create versions for different retailers, stores or regions, all managed from one place.
To keep your assets secure, 3D models are converted into Emersya’s proprietary file format upon upload, so the original files can’t be downloaded from the viewer. Access to the platform is password-protected, with single sign-on (SSO) for enterprise users and access rights set per user and per project.
4. How easy is it to maintain and update?
Browsers and devices change constantly. With a custom build, keeping your configurator compatible is an ongoing maintenance cost that falls on your team.
On the Emersya platform, the platform architecture and 3D viewer technology are maintained and updated automatically by the Emersya team, with compatibility guaranteed across all recent browsers and devices. Your configurator’s updates are just as simple, thanks to a no-code interface, version control and centralized asset libraries with synchronized deployment.
5. Will the platform grow with your projects?
Brands often start with one product line, then expand to more collections, new markets and add new features or more bespoke interfaces. It’s difficult to know exactly what you are going to need a couple of years down the line when you are planning your first project.
Emersya offers a future-proof platform and 3D viewer that are developed and maintained entirely by Emersya’s in-house team. The same 3D assets you upload for your configurator(s) can also be used to offer 3D and AR product story-telling, auto-generate 3D product images and even to design and approve your next product range. Our R&D department is constantly working on new features and keeping our product rendering engine state-of-the-art to ensure our customers can show their products in true-to-life real-time 3D. We work closely with our customers to understand their specific needs and integrate new feature developments into our roadmap accordingly.
Building a 3D product configurator is a project with many moving parts, but it doesn’t have to be overwhelming. Start by defining your scope, choose the workflow that matches your product and resources, then launch a first version you can measure and improve. Don’t treat launch day as the finish line: the most successful configurators keep evolving with their customers.
DEMO
Build your next configurator on the Emersya platform
Book a discovery call with our team to see how you can create your next 3D product configurator.
Frequently Asked Questions
A 3D configurator lets customers explore every option and combination of a product in real-time 3D, from any angle, before they buy. This helps enhance user experience, engage shoppers for longer and give them the confidence to purchase. For brands, the advantages of a 3D product configurator include higher conversion rates, fewer returns and more efficient sales and production processes.
To understand how 3D product configuration improves sales, start with the customer. When shoppers can see exactly what they’re creating, they hesitate less and feel more ownership of the result. That confidence turns browsing into buying. It also reduces the gap between what customers expect and what they receive, which is a major cause of returns.
Behind the scenes, a 3D configurator also removes costly manual work. A single set of 3D assets replaces photoshoots for every variant, while order data, quotes and production files can be generated automatically.
For a closer look at each of these benefits, read our article on the real benefits of a 3D product configurator.